
Saturday, December 1, 2012
Christmas Crazy
Christmas Crazy. That would be my husband. Christmastime in the TC household has always been a huge deal. One of the biggest Christmas traditions is putting up lights! LOTS of light! Want to see what 8,000+ lights looks like?

216 Inches
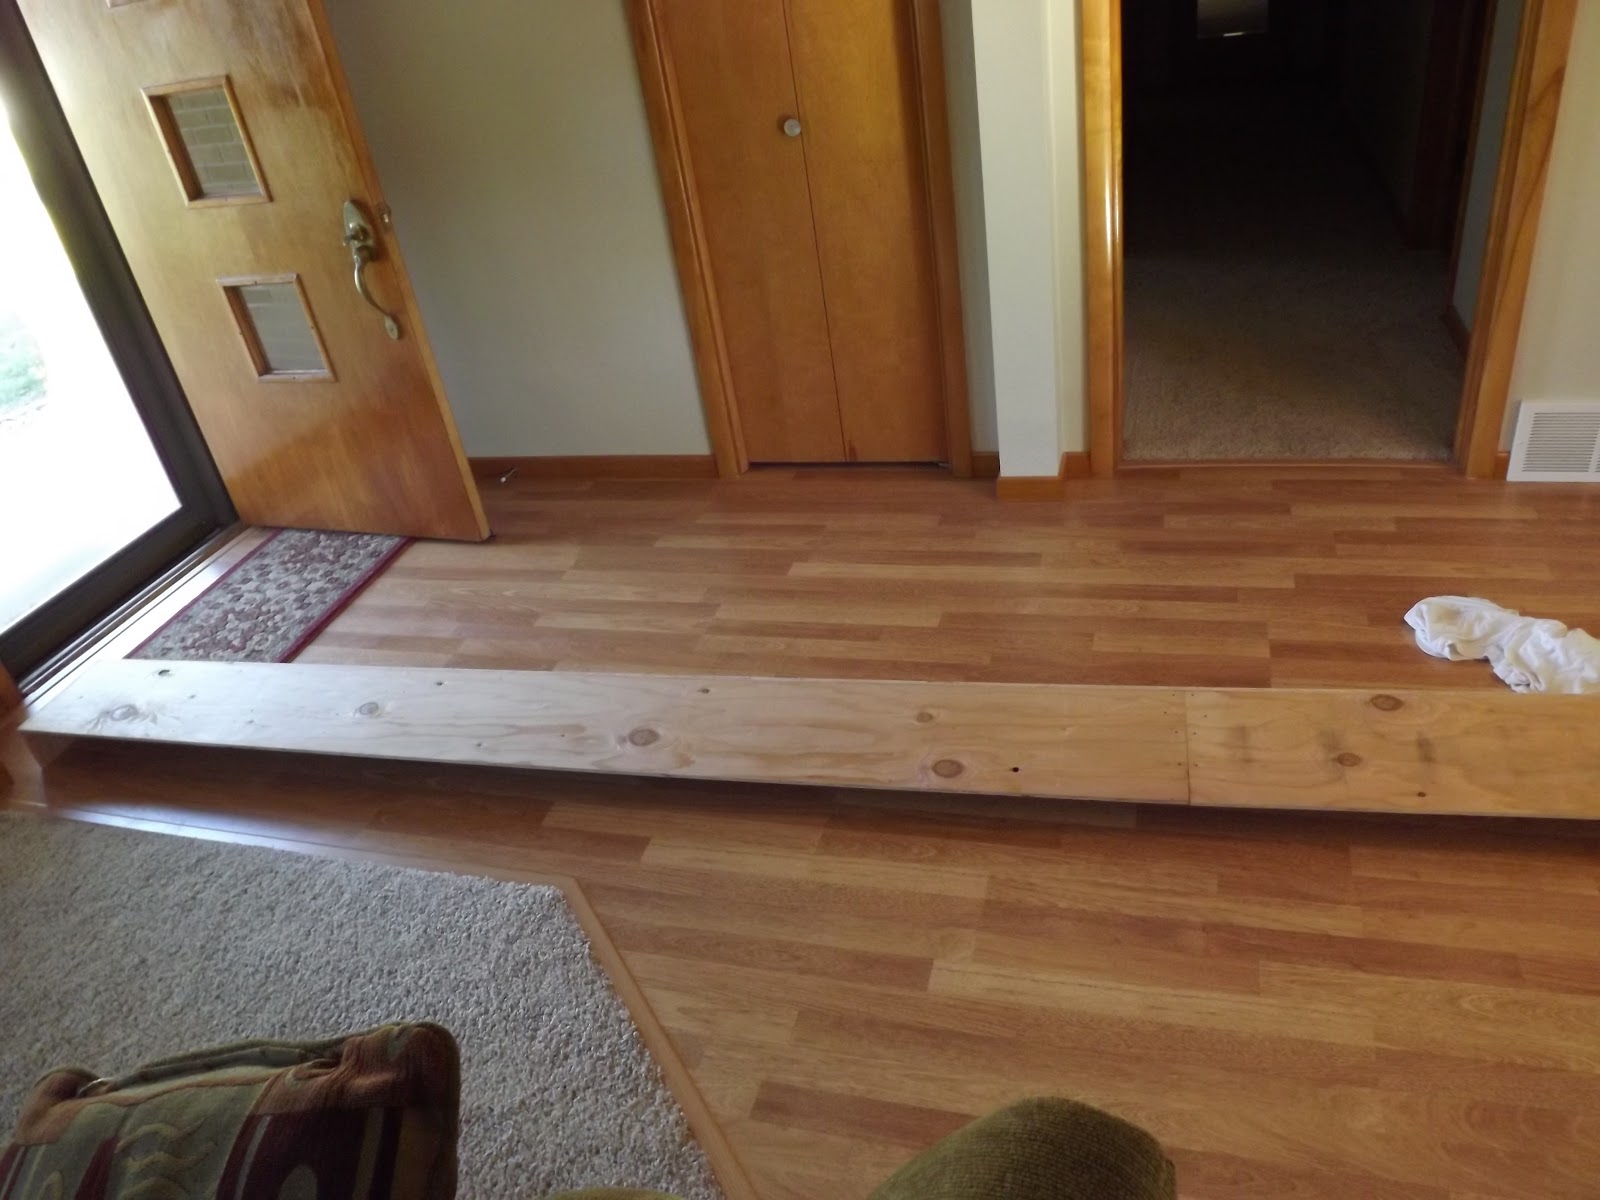
Last summer, my mom and I were busy making curtains for my kitchen, dining room, bathroom, and bedroom. We also talked about making a cornice board for my living room window, which happens to be 216 inches long. (That's 18 feet long!) We even got so far as to buying the upholstery material. Then it sat in my closet for one year! Dan and his dad made the board for me a few weeks ago, and then my mom and I upholstered it. Here's the process:
 |
| I really don't know how they made this besides the fact that it is made from plywood and has several support pieces. Google it! |
 |
| Grandma always said, "Measure twice, cut once." |
 |
| I used permanent fabric spray adhesive to adhere the batting to the board. |
 |
| We had to sew strips of our fabric together to get one continuous piece to cover our board. We started to staple from one end to the other. We finished the corners last. |
 |
| I wanted to cover the back for a more finished look and to cover all my staples. I stapled one end of my black fabric toward the edge of the board and then folded it over so my staples were hidden. |
 |
| Oops! I didn't measure twice! When cutting the black backing fabric, I forgot to account for some extra room to cover the staples. I still had about an inch of exposed board. So I stapled the black down and got some wide, black satin ribbon. I just used tacky glue to glue the ribbon down the whole way. You can't tell because nobody really sees it, but it does cover the staples nicely! |
 |
| The finished product! I can't even get the whole thing on my camera! So glad to have this project done, and I'm happy with the results! Thanks everybody for the help! |
Brownies+Marshmallow+Rice Krispies=?
Who would ever think of putting these things together? I don't know who did, but they were a genius! These three-layer bars (Margo Bars) take a little time to throw together, but they are SO worth it!
First layer: Brownies!

Second Layer: Marshmallow creme!
 Third Layer: Rice Krispies with chocolate & peanut butter
Final Product!
 Margo Bars
First Layer:
1 c. butter
2 c. sugar
4 eggs
6 Tbsp. cocoa
1 c. flour
2 tsp. vanilla
1/2 tsp. salt
In a mixing bowl, cream butter & sugar. Add eggs. Stir in cocoa, flour, vanilla & salt. Spread in a greased 9x13 pan. Bake at 350 degrees for 25 minutes or until done. Cool.
Second Layer:
1 jar marshmallow creme
Spread creme over cooled brownies.
Third Layer:
1 c. peanut butter
2 c. chocolate chips
3-4 c. Rice Krispies
In microwave, melt chocolate chips & peanut butter. Stir in cereal. Spread over marshmallow layer. Chill before cutting. Store in the refrigerator.
First layer: Brownies!

Second Layer: Marshmallow creme!

Final Product!

First Layer:
1 c. butter
2 c. sugar
4 eggs
6 Tbsp. cocoa
1 c. flour
2 tsp. vanilla
1/2 tsp. salt
In a mixing bowl, cream butter & sugar. Add eggs. Stir in cocoa, flour, vanilla & salt. Spread in a greased 9x13 pan. Bake at 350 degrees for 25 minutes or until done. Cool.
Second Layer:
1 jar marshmallow creme
Spread creme over cooled brownies.
Third Layer:
1 c. peanut butter
2 c. chocolate chips
3-4 c. Rice Krispies
In microwave, melt chocolate chips & peanut butter. Stir in cereal. Spread over marshmallow layer. Chill before cutting. Store in the refrigerator.
Saturday, November 24, 2012
Zesty Italian Crescent Casserole

1 lb. hamburger
1/4 c. chopped onions
1 small jar spaghetti sauce
1 1/2 c. shredded Mozzarella cheese
8 oz. sour cream
1 pkg. refrigerator crescent rolls
1/2 c. Parmesan cheese
2 Tbsp. butter
Brown hamburger and onion; drain. Stir in spaghetti sauce. Pour into an 8x11-inch pan. Combine Mozzarella cheese and sour cream. Spoon over top of meat mixture. Roll out crescent rolls in one piece. Place over cheese. Combine Parmesan cheese and butter. Crumble over crescent rolls. Bake at 350 degrees for 40-45 minutes, or until crust is brown and meat is bubbly. Let stand a few minutes before cutting.
Pallet Project
What do you get when you combine these two items?


 This can be used for anything you want, but I use mine in the entryway as a picture holder. My dad had a few wooden pallets hiding around the farm, and he helped me cut four boards off of it. We left the nail heads in to keep it rustic. My husband helped me make it into a frame. We put L brackets on the corners to hold it together, and then stapled chicken wire behind it. To keep the chicken wire from scratching the wall, I found cupboard door stoppers. We also added two picture hangers. The total project measures about four feet wide by three feet tall.
 I added mini clothespins to hold up our Christmas pictures that we receive each year. Pretty soon, my holder will be full!


PLUS

EQUALS


Sunday, November 18, 2012
Time flies...
I can't believe Thanksgiving is almost here! But then, it seems I say that about everything. At the start of every month I somehow manage to once again be amazed by how "fast" time flies. You'd think I'd get used to time flying after 25 years!
Some nights it seems like time flies, too. The time between getting off of work and needing to eat seems to be getting shorter and shorter. That's why I love this recipe. It literally took me about seven minutes to prepare! (And no, I didn't actually time myself!)
Mozzarella Ham Stromboli
1 (11 oz.) tube refrigerated crusty French loaf
2 c. shredded Mozzarella cheese
1/4 lb. thinly-sliced deli ham
1 Tbsp. butter, melted
1 Tbsp. grated Parmesan cheese
On a lightly-floured surface, pat dough into a 14x12-inch rectangle (or open/roll out at seam). Sprinkle Mozzarella cheese over dough to within 1/2-inch of edges. Top with ham. Roll up tightly from long side; pinch seam to seal. Place, seam-side down, on an ungreased baking sheet. Brush top of loaf with butter; sprinkle with Parmesan cheese. Bake at 375 degrees for 20-25 minutes or until golden brown. Cool for 5 minutes. Cut with serrated knife.
Some nights it seems like time flies, too. The time between getting off of work and needing to eat seems to be getting shorter and shorter. That's why I love this recipe. It literally took me about seven minutes to prepare! (And no, I didn't actually time myself!)
 |
 |
| The recipe says to pat out the crusty French loaf. I just find the seam and start to unroll it. It's not perfectly rectangular, but it's quicker and less frustrating! |
 |
| After it's rolled up, brush with butter & sprinkle on Parmesan cheese. I always use the "fake" Parmesan because I have it in the house, but I think the recipe intends for grated/shredded Parmesan to be used. |
 |
| Yum! It tastes great served with spaghetti or pizza sauce. If your husband is like mine, you won't have many leftovers! |
1 (11 oz.) tube refrigerated crusty French loaf
2 c. shredded Mozzarella cheese
1/4 lb. thinly-sliced deli ham
1 Tbsp. butter, melted
1 Tbsp. grated Parmesan cheese
On a lightly-floured surface, pat dough into a 14x12-inch rectangle (or open/roll out at seam). Sprinkle Mozzarella cheese over dough to within 1/2-inch of edges. Top with ham. Roll up tightly from long side; pinch seam to seal. Place, seam-side down, on an ungreased baking sheet. Brush top of loaf with butter; sprinkle with Parmesan cheese. Bake at 375 degrees for 20-25 minutes or until golden brown. Cool for 5 minutes. Cut with serrated knife.
Monday, November 12, 2012
(Almost) 2 Years In...
The Moss parents and siblings all had a mini photo shoot the other day, thanks to my SIL of Southern Belle Portraiture. We don't look much different than when we took our wedding pictures (almost 2 years ago!), besides the wardrobe, of course!


Peanut Butter Ripple Brownies
We had a fun time getting together with some friends this weekend. We enjoyed a wonderful meal together and then enjoyed eating these extremely healthy bars for dessert. I do somehow manage to end up taking dessert to many of our get-togethers. I wonder what that means?...
Peanut Butter Ripple Brownies
3/4 c. sugar
1/2 c. peanut butter
1/4 c. flour
2 eggs
1 package supreme brownie mix (with a chocolate syrup pouch)
1/4 c. water
1/4 c. vegetable oil
2 eggs
Heat oven to 350 degrees. Grease bottom only of a 9x13 pan. Beat sugar, peanut butter, flour and 2 eggs in small bowl on medium speed for 2 minutes; set aside. In another bowl, stir brownie mix, chocolate syrup pouch, water, oil, & 2 eggs until well blended; spread in pan. Drop peanut butter mixture by tablespoonfuls onto brownie batter. Swirl through batter with knife. Bake 40 minutes. Cool for 1 hour. Frost with Peanut Butter Frosting (see below). May sprinkle with peanuts.
Peanut Butter Frosting
1 c. (about 1/2 tub) Betty Crocker Rich & Creamy vanilla, ready-to-spread frosting
1/3 c. peanut butter
2-3 tsp. milk (to make a good consistency)
Stir all ingredients together, using a spoon, until smooth & spreadable. Frost bars.
I personally think these taste the best when they're warm & topped with vanilla ice cream. :)
As a side note, please don't think I invented any of these recipes from scratch. Most of these are from family members, and who knows where they got them from!
 |
| Swirl the chocolate & peanut butter layers together with a knife. |
 |
| Bad picture...there weren't very many left! |
3/4 c. sugar
1/2 c. peanut butter
1/4 c. flour
2 eggs
1 package supreme brownie mix (with a chocolate syrup pouch)
1/4 c. water
1/4 c. vegetable oil
2 eggs
Heat oven to 350 degrees. Grease bottom only of a 9x13 pan. Beat sugar, peanut butter, flour and 2 eggs in small bowl on medium speed for 2 minutes; set aside. In another bowl, stir brownie mix, chocolate syrup pouch, water, oil, & 2 eggs until well blended; spread in pan. Drop peanut butter mixture by tablespoonfuls onto brownie batter. Swirl through batter with knife. Bake 40 minutes. Cool for 1 hour. Frost with Peanut Butter Frosting (see below). May sprinkle with peanuts.
Peanut Butter Frosting
1 c. (about 1/2 tub) Betty Crocker Rich & Creamy vanilla, ready-to-spread frosting
1/3 c. peanut butter
2-3 tsp. milk (to make a good consistency)
Stir all ingredients together, using a spoon, until smooth & spreadable. Frost bars.
I personally think these taste the best when they're warm & topped with vanilla ice cream. :)
As a side note, please don't think I invented any of these recipes from scratch. Most of these are from family members, and who knows where they got them from!
Saturday, November 10, 2012
The View...
I'm not talking about the day-time talk show. Here's the view from my chair tonight:

 It was somewhere near 60 degrees today...and he pulls out Christmas lights?! I love Christmas, but I'm not ready for snow!


Picky
Some might say I'm a picky eater; I prefer to think of myself as selective. The funny thing is, I'm usually up for trying most new things. While visiting Tanzania and Trinidad, I tried many new and interesting foods. I also might be content to never try them again, but at least I ate something new. I have a limit, though. There is a food "group" that I refuse to eat or even taste. It all comes down to one word: FISH. To me, fish also includes crab, lobster, oysters, scallops, shrimp, etc. (Even though I know these are technically crustaceans, not fish. It's all the same!)
I usually try not to use this word, but I HATE fish. It gives me the willies. And it's not just eating fish. What else don't I like concerning fish?
While my husband loves fish, the only type I allow in my house is probably one of the most-hated types for most everybody else: tuna. This is probably the only seafood dish you'll ever see me eat! It also helps that it's fast and simple!

Tuna Noodle Casserole
2 c. water
1 1/2 c. uncooked noodles
1 can tuna (in water), drained
1 can cream of chicken soup
10 oz. frozen peas (I use less; about 1/2 a bag)
Pour water into a 2-quart casserole dish. Microwave on high for 5 minutes. Stir in noodles and peas and cook on high for 10 minutes or until noodles are tender. (Do not cover dish.) Drain. Stir in in tuna and soup. Top with Velveeta slices and allow cheese to melt. (I usually microwave for about 3 more minutes.) Stir and serve.
I usually try not to use this word, but I HATE fish. It gives me the willies. And it's not just eating fish. What else don't I like concerning fish?
- Swimming with fish (Not that I actually "swim" much, but who would want to in a body of water where fish relieve themselves & nibble on your toes?!)
- Smelling fish...enough said
- Fishing (Did it once, and once was enough. And yes, I made my uncle and cousin put the worm on and take the fish off!)
While my husband loves fish, the only type I allow in my house is probably one of the most-hated types for most everybody else: tuna. This is probably the only seafood dish you'll ever see me eat! It also helps that it's fast and simple!

Tuna Noodle Casserole
2 c. water
1 1/2 c. uncooked noodles
1 can tuna (in water), drained
1 can cream of chicken soup
10 oz. frozen peas (I use less; about 1/2 a bag)
Pour water into a 2-quart casserole dish. Microwave on high for 5 minutes. Stir in noodles and peas and cook on high for 10 minutes or until noodles are tender. (Do not cover dish.) Drain. Stir in in tuna and soup. Top with Velveeta slices and allow cheese to melt. (I usually microwave for about 3 more minutes.) Stir and serve.
Sweet & Salty

 |
| You'll need to crunch about one cup of pretzels. It's easiest to put the pretzels in a Ziploc bag and crunch with a rolling pin. No mess! |
 |
| The best part: pretzels baked with butter and sugar! |
 |
| Salad sans pretzels. Don't add them until right before serving, otherwise it can get soggy. |
1 c. crushed pretzels
1 stick melted butter
1/3 c. sugar
Mix these three ingredients together. Spread in pan. Bake at 400 degrees for 6 minutes. Cool and break apart. In another bowl, mix:
1 large can crushed pineapple
8 oz. cream cheese, softened
12 oz. Cool Whip, softened
Mix together. Add pretzels right before serving.
**For a strawberry version, use strawberry cream cheese and fresh or frozen strawberries!
Monday, October 29, 2012
Butterfinger Cake
We were blessed to celebrate Grandma M's 87th birthday this year! We had a belated birthday party for her when my uncle and aunt came up from Kentucky. Anyway, birthday parties need birthday cake, right? Even though this might not be the most traditional birthday cake, it worked well and tasted delicious. I've also taken this cake to many other places, and it's always a hit. Thanks to Grandma V for another great recipe!
Butterfinger Cake
1 box yellow cake mix
1 small instant vanilla pudding
2 c. warm water
2 eggs, beaten
Mix and pour into a greased 9x13 pan. Bake at 350 degrees for 25-30 minutes or until a toothpick comes out clean. Cool cake and top with the following:
Melt 1/2 c. butter
Add 1 c. sifted powdered sugar
Mix well and add 12 oz. tub of Cool Whip. Spread over the cooled cake. Crush 3 Butterfinger bars and sprinkle on top. May also use Heath bars or English Toffee bits. Keep refrigerated.
 |
| Mix eggs, cake mix, pudding mix, and water to make the cake. |
 |
| Bake at 350 degrees for 25-30 minutes. |
 |
| When cool, mix powdered sugar, butter, and Cool Whip. Frost. |
 |
| What happened to the purple hammer my dad gave me for Christmas? It gets used most often for "cooking" purposes than to pound nails! |
 | |
| Happy 87th Birthday, Grandma M! Love you! |
1 box yellow cake mix
1 small instant vanilla pudding
2 c. warm water
2 eggs, beaten
Mix and pour into a greased 9x13 pan. Bake at 350 degrees for 25-30 minutes or until a toothpick comes out clean. Cool cake and top with the following:
Melt 1/2 c. butter
Add 1 c. sifted powdered sugar
Mix well and add 12 oz. tub of Cool Whip. Spread over the cooled cake. Crush 3 Butterfinger bars and sprinkle on top. May also use Heath bars or English Toffee bits. Keep refrigerated.
Friday, October 26, 2012
Open House
The TC family decided to try a new adventure...a furniture store! Dan's parents, brothers, and us joined forces to buy a local store. We've been busy updating computers, increasing inventory, and learning the ropes in this new venture. Today we had a ribbon cutting and grand re-opening. I don't have a copy of the picture, but I have something better! We shared coffee, cider, and cookies with our guests today, and I have to share some recipes with you! I made my aunt's Cowboy Cookies for this event, and they are so chewy and delicious. Definitely a favorite!
 Cowboy Cookies
2 c. sugar 2 tsp. baking powder
2 c. brown sugar 2 tsp. baking soda
2 c. shortening (or butter) 2 tsp. salt
4 eggs 4 c. oatmeal
2 tsp. vanilla 2 c. chocolate chips
4 c. flour
Cream sugar & shortening. Combine eggs & vanilla. Add to mixture. Combine flour, baking powder, soda & salt. Add to batter. Mix in oatmeal & chocolate chips. Bake at 350 degrees for 10-11 minutes. Don't over bake--they'll get hard.
*Makes 5-6 dozen.
*There is a lot of batter. My KitchenAid was very full.
*I've thought about substituting butterscotch or peanut butter chips in, also.
And, if you want something great to drink with this, try this apple cider recipe! It was perfect for today's cold, blustery weather!
Apple Cider
1 tsp. whole allspice
2 tsp. whole cloves
Dash of ground nutmeg
3 inches cinnamon stick
Tie all ingredients in cheezcloth, put in a tea ball, or in the top filter of a percolator. Use with 2 quarts of pre-made apple cider (not apple juice!). Simmer as long as you like--the longer it simmers, the stronger it gets!
Pumpkins!
We are blessed to part of a great group of people who meet every week for Bible Study. This year we've been studying the fruits of the Spirit, but every once in awhile we throw an extra fun thing in the mix. We decided to keep up our tradition of carving/painting pumpkins.


The final products! We forgot to print off any fun templates, so Dan carved a jack 'o lantern face, and I painted a man on the moon. Next year we'll go better prepared!
Monday, October 22, 2012
Chicken Wild Rice Soup
'Tis the season for soup, and I'm going to take full advantage of it!
 Chicken Wild Rice Soup
1 box Uncle Ben's wild rice, MADE according to package directions
1 can cream of potato soup
1 lb. Velveeta cheese, or less
1 can cream of chicken soup
1 lb. bacon, fried & crumbled
1 pt. Half & Half
1 pt. milk
2-3 c. chicken, cooked & cubed
Prepare wild rice according to package directions. Add all other ingredients & cook over medium heat, stirring frequently.* (I usually wait until it warms up before I add the Velveeta.) May serve with crackers & shredded cheese.
*Trust me on this one: it's very important to stir very frequently. If you don't, you'll get a disgusting layer of burned cheese on the bottom of your pan. :)
 |
| The needed ingredients... |
 |
| Don't forget the bacon!!! I baked mine at 350 degrees for about 30 minutes. Make sure to lay it in a single layer. No need to flip! |
 |
| Make the rice first. This takes about 25-30 minutes. |

1 box Uncle Ben's wild rice, MADE according to package directions
1 can cream of potato soup
1 lb. Velveeta cheese, or less
1 can cream of chicken soup
1 lb. bacon, fried & crumbled
1 pt. Half & Half
1 pt. milk
2-3 c. chicken, cooked & cubed
Prepare wild rice according to package directions. Add all other ingredients & cook over medium heat, stirring frequently.* (I usually wait until it warms up before I add the Velveeta.) May serve with crackers & shredded cheese.
*Trust me on this one: it's very important to stir very frequently. If you don't, you'll get a disgusting layer of burned cheese on the bottom of your pan. :)
Sunday, October 21, 2012
The most requested salad...by everybody else!
As long as I can remember, my mom has been asked to make this salad for family gatherings. It's easy, and everybody seems to enjoy it. Everybody but me! Growing up, lettuce & I never had a strong relationship. Over the past few years, I've basically forced myself to eat lettuce. Sometimes I even enjoy a salad, but the lettuce has to be covered in cheese, meat, eggs, and about 1/4 teaspoon of dressing. So while I have formed a tenuous relationship with lettuce, I still refuse mayonnaise. But for all of you who love all of these things, here's a great recipe for you!


Layered Lettuce Salad
Ingredients:
 | ||
1-2 bags of lettuce
2 c. frozen peas, thawed
4 hard-boiled eggs, chopped
2 c. Kraft Mayo
2 Tbsp. sugar
Shredded cheddar cheese
Crumbled bacon
 | |
| Here's the secret ingredient: Kraft REAL Mayo. Don't use anything else! (Or so I've been told...) |

Put lettuce in bottom of a 9x13 pan. Layer thawed peas & chopped eggs on top.

Mix sugar with mayo & spread over layers like frosting. Sprinkle cheese & bacon on top. Refrigerate.

Subscribe to:
Comments (Atom)